Reality gap: Experiment 2
The experimental scenario and the experimental procedure of the experiment are described in Chapter 4.2 of my Ph.D. thesis and in:
- G. Podevijn, R. O'Grady, C. Fantini-Hauwel, and M. Dorigo, Human Responses to Stimuli Produced by Robot Swarms - The Effect of the Reality Gap on Psychological State, in Proceedings of the 13th International Symposium on Distributed Autonomous Robotic Systems (DARS), Springer Tracts in Advanced Robotics, 2016, in press.
Setting up the experiment
In this section, we describe the steps to install and run the robot controller code of the experiment.
TCP server and client
In this experiment, you will need the TCP server and client. On the
Materials webpage, you will find a
.jar file for each of them. The .jar files are the executables used to run the
server and the client. By default, the server listens for new connections on
the port 4321 and the client tries to connect on localhost:4321. If you
want to change these values, you will need to download the source code, make
the modifications and recompile the Java classes into a new .jar file.
The Java TCP client used in this experiment is different from the Java TCP client used in experiment 1. It has three goals. The first goal is to start the experiment (i.e., to make the robot moving). The second goal is to send to the robots the signal to change their LEDs color. The third goal is to record the participant's reaction time (i.e., difference between the time a robot illuminates its LEDs in red and the time the participant presses the button).
When the experiment has started, the client is continuously
waiting for a user input. The expected user input is the Enter key. If you hit "Enter"
on your keyboard whilst the client is running, the client will display:
User pressed button.
The Bluetooth gamepad used in our experiment has a button that sends the same
signal as the Enter key of a keyboard. Therefore, during an experiment it is
important that the terminal in which the client is running is the foreground
application of the computer. If the terminal is not the foreground application
of the computer, the client will never receive any signal coming from the
device.
The gamepad used in our experiment is a Mini wireless bluetooth gamepad available on Aliexpress.com.
In simulation -- ARGoS
Download the robot controller
Make sure that ARGoS 3 is correctly installed and go to the Materials webpage to download the robot controller for ARGoS.
Compile and run the controller
Once you have downloaded the archive of the controller code, uncompress it and go into
the epuck_reality_gap2 directory.
>> tar xvzf RealityGap_exp2.tar.gz
>> cd epuck_reality_gap2/
In this directory, you will find two files and two directories:
CMakeLists.txt: used to find multiple CMake configuration files for ARGoS. You won't need to edit this file.reality_gap2.argos: the controller XML configuration file. The simulated environment and the simulated robots are configured in the<arena>tag. The calibration files of the real robots' sensors are referred in thelow_level_configattribute of each sensor's tag. You can leave this attribute as is if you run the controller in simulation.src: a directory with the source code of the controller.cmake: a directory containing configuration files for CMake. You don't need to edit anything in this directory.
Compile the controller by executing the following steps:
>> mkdir build # create a build directory
>> cd build
>> cmake ..
>> make
Go to the directory in which you downloaded the Java TCP server and run it:
>> java -jar PsychoExperimentTCPServer.jar
Go to the directory in which you downloaded the Java TCP client. Create a
data directory. This directory will contain all the reaction time result
files of your participants:
>> mkdir data
Run the TCP client. The .jar file expects two parameters: the type of
session (ar: simulation in ARGoS, vr: simulation in virtual reality,
rr: real robots) and an identification of the participant used to create
their result file.
>> java -jar RealityGapExperiment2Client.jar ar A_PARTICIPANT_ID
Starting simulation Argos
Press 'a' to start ARGoS experiment, 'v' to start the 'virtual reality' experiment and 'r' to start real robots:
Run the controller in ARGoS:
>> argos3 -c reality_gap2.argos
If everything went well, you should see the following screen:
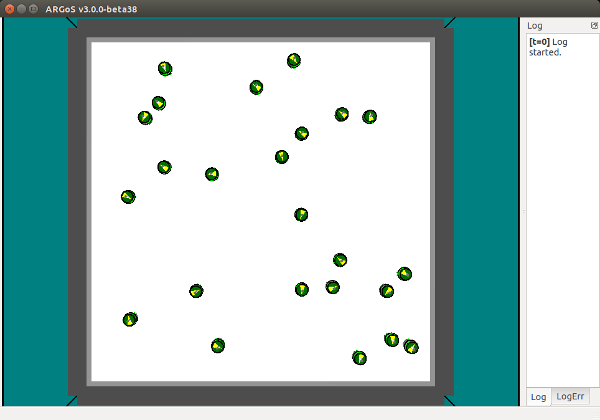
Start the experiment in ARGoS (by clicking the Play button, not shown on the
above picture). At this point the robots are not moving. The robots will start
moving as soon as you start the experiment from the TCP client.
In the Java TCP client, press a to start the experiment. The robots are now
moving in the environment for 60 seconds. Do not forget to keep on the
foreground the terminal in which you started the TCP client.
In simulation -- Android
Download the Android application
Go to the Materials webpage and download the source code of the application.
Compile and run the application
Firstly, download and install Unity3D. Do not forget to install the "Android building packages" while you are installing Unity3D. Then, extract the source code of the application:
tar xvzf VRRealityGapExperiment2.tar.gz
Open Unity3D and open a new project. Select the directory that contains the
source code of the application (UnityRealityGapExperiment2). Unity3D will
import the project.
Once the project is imported, open the scene (File > Open scene)
Assets/Scenes/experimentScene.unity. In the Project tab of Unity3D, go to
the directory Scripts and double click on the file TCPConnection.cs.
Edit the following function with the IP address on which the Java TCP server is running:
    void Start {
        Debug.Log(tcpClient.Connect("10.0.0.99", 4321));
    }
Connect your Android device to your computer. In Unity3D, build the application
for Android. In File > Build Settings, select "Android" and click Build and
Run. After a few minutes, the application should be installed on your Android
device.
Go to the directory in which you downloaded the Java TCP server and run it:
>> java -jar PsychoExperimentTCPServer.jar
Go to the directory in which you downloaded the Java TCP client and create a
data directory. The data directory will contain the reaction time results of
the participant conducting the experiment
>> mkdir data
Run the TCP client. The .jar file expects two parameters: the type of
session (ar: simulation in ARGoS, vr: simulation in virtual reality,
rr: real robots) and an identification of the participant used to create
their result file.
>> java -jar RealityGapExperiment2Client.jar vr A_PARTICIPANT_ID
Starting simulation Vr
Press 'a' to start ARGoS experiment, 'v' to start the 'virtual reality' experiment and 'r' to start real robots:
Run the application on your Android device. If everything went well, you should see the following screen:

Once the application is launched, insert your device in a virtual reality headset (e.g., the Google Cardboard).
In the Java TCP client, press v to start the experiment. The robots are now
moving in the environment during 60 seconds. Do not forget to keep on the
foreground the terminal in which you started the TCP client.
On real robots
The robot controller is the same as the one used in simulation (ARGoS).
Compile the controller for the real robots
Make sure that the ARGoS-Epuck plugin is correctly installed for the real robots.
In the controller directory, edit the file src/CMakefile.txt at line 13 (add
the correct path to the argos3-epuck plugin directory):
PATH_TO_ARGOS3_EPUCK_PLUGIN/src/plugins/robots/e-puck/real_robot/real_epuck_main.cpp)
Compile the controller by executing the following steps:
>> mkdir build_realepuck
>> cd build_realepuck
>> cmake -DCMAKE_BUILD_STYLE=Release -DCMAKE_TOOLCHAIN_FILE=PATH_TO_ARGOS3_EPUCK_PLUGIN/src/cmake/TargetEPuck.cmake ..
>> make
Do not forget to edit the path to the argos3-epuck plugin directory as above.
Run the controller on the real robots
Install the controller and its configuration file (the XML file) on the robots:
>> cd argos3-epuck/scripts
>> ./upload.sh file PATH_TO_REALITY_GAP2_CONTROLLER/build_realepuck/src/reality_gap2 /destination/path/on/robot/ XX
>> ./upload.sh file PATH_TO_REALITY_GAP2_CONTROLLER/reality_gap2.argos /destination/path/on/robot/ XX
where XX corresponds to the identification number of an e-uck.
Go to the directory in which you downloaded the Java TCP server and run it:
>> java -jar PsychoExperimentTCPServer.jar
Go to the directory in which you downloaded the Java TCP client and create a
data directory. The data directory will contain the reaction time results of
the participant conducting the experiment
>> mkdir data
Run the TCP client. The .jar file expects two parameters: the type of
session (ar: simulation in ARGoS, vr: simulation in virtual reality,
rr: real robots) and an identification of the participant used to create
their result file.
>> java -jar RealityGapExperiment2Client.jar rr A_PARTICIPANT_ID
Starting simulation Real robots
Press 'a' to start ARGoS experiment, 'v' to start the 'virtual reality' experiment and 'r' to start real robots:
In order to run your controller on an e-puck robot, first connect to the e-puck robot:
>> ssh root@10.0.1.XX
where XX is the identification number of an e-puck. The password is root.
Run the controller by writing:
>> ./reality_gap2 -c reality_gap2.argos -i rg2
The robots are waiting for a message from the server to start moving. Press r in the TCP client in order to start the experiment. If everything went well, the e-puck robot should start executing the controller.
Data analysis
In this section, we provide the data and the R and Python scripts used to analyse and plot the data.
Data
The following archive contains a text file for each type of data (heart rate, skin conductance, arousal, valence, reaction time and workload).
Scripts
- Boxplots/Barplots: R scripts that generate the boxplots and barplots
- Friedman/Nemenyi: R scripts that execute the Friedman and Nemenyi post-hoc tests
- Nemenyi CD Diagram: Python scripts that generate the Nemenyi critical difference diagrams. The scripts require the Python library Orange.
- Correlation: R scripts that execute the correlation tests