Group size
The experimental scenario and the experimental procedure of the experiment are described in Section 5.2 and 5.6 of my Ph.D. thesis and in:
- G. Podevijn, R. O'Grady, N. Mathews, A. Gilles, C. Fantini-Hauwel, and M. Dorigo, Investigating the effect of increasing robot group sizes on the human psychophysiological state in the context of human-swarm interaction, Swarm Intelligence, vol. 10, no. 3, pp. 193-210, 2016. Download pdf
Setting up the experiment
In this section, we describe the steps to install and run the robot controller code of the experiment.
Download the robot controller
Make sure that ARGoS3 and that the ARGoS3-Epuck plugin are correctly installed and then go to the Materials webpage and download the group size controller code for ARGoS.
Note
This robot controller is meant to be run on the real e-puck robot platform (the experiment is not conducted in simulation).
Though this experiment should be conducted on real robots, the controller code runs in simulation as well. In the following, you will be able to run the controller in simulation.
Once you have download the archive of the controller code, uncompress it and go into the group_size directory.
tar xvzf GroupSize.tar.gz
cd group_size/
In this directory, you will find two files and a directory:
CMakeLists.txt: used to find multiple CMake configuration files for ARGoS. You won't need to edit this file.group_size.argos: the controller XML configuration file. The simulated environment and the simulated robots are configured in the<arena>tag. The calibration files of the real robots' sensors are referred in thelow_level_configattribute of each sensor's tag. You can leave this attribute as is if you run the controller in simulation.src: a directory with the source code of the controller.
Compile the controller by executing the following steps:
mkdir build_simepuck
cd build_simepuck
cmake ..
make
Run the controller in ARGoS:
argos3 -c group_size.argos
If everything went well, you should see the following screen:
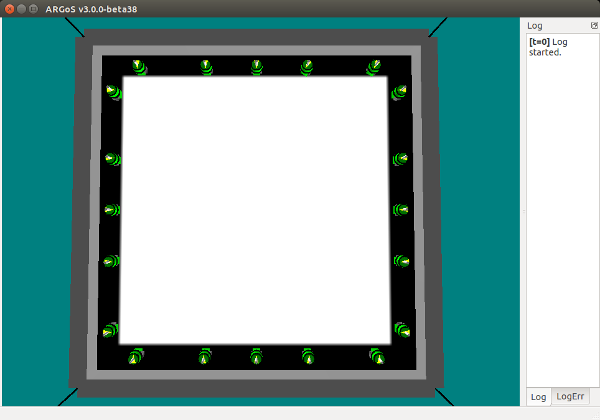
When you will start the experiment, all the robots will start moving.
Compile the controller for the real robots
Make sure that the ARGoS-Epuck plugin is correctly installed for the real robots.
In the controller directory, edit the file src/CMakefile.txt at line 13 (add
the correct path to the argos3-epuck plugin directory):
PATH_TO_ARGOS3_EPUCK_PLUGIN/src/plugins/robots/e-puck/real_robot/real_epuck_main.cpp)
Compile the controller by executing the following steps:
>> mkdir build_realepuck
>> cd build_realepuck
>> cmake -DCMAKE_BUILD_STYLE=Release -DCMAKE_TOOLCHAIN_FILE=PATH_TO_ARGOS3_EPUCK_PLUGIN/src/cmake/TargetEPuck.cmake ..
>> make
Do not forget to edit the path to the argos3-epuck plugin directory as above.
Run the controller on the real robots
Install the controller and its configuration file (the XML file) on the robots:
>> cd argos3-epuck/scripts
>> ./upload.sh file PATH_TO_GROUP_SIZE_CONTROLLER/build_realepuck/src/group_size /destination/path/on/robot/ XX
>> ./upload.sh file PATH_TO_GROUP_SIZE_CONTROLLER/group_size.argos /destination/path/on/robot/ XX
where XX corresponds to the identification number of an e-uck.
In order to run your controller on an e-puck robot, first connect to the e-puck robot:
>> ssh root@10.0.1.XX
where XX is the identification number of an e-puck. The password is root.
Run the controller by writing:
>> ./group_size -c group_size.argos -i gs
If everything went well, the e-puck robot should start executing the controller.
Technical notes on the experimental procedure
As described in the experimental scenario (see Section 5.2 of my Ph.D. thesis), the experiment is divided into three sessions: 1-robot, 3-robot and 24-robot. In the first session, 1 robot goes out of its hidden zone. In the second session, 2 additional robots go out of their hidden zone. In the last session, 21 robots go out of their hidden zone. Each session lasts 45 seconds.
For each session, we started the controller of each robot manually. We were
connected to each robot via ssh and we launched the controller of the
robots that had to go out of their hidden zone at the same time. In order to
launch the controller code of the robots at the same time, we used the software
Terminator which
allows us to synchronize multiple terminals (i.e., a command entered in one
terminal is also entered in the synchronized terminals). We had one terminal per robot.
For the 3-robot session, we synchronized 2 terminals (the third robot was the
robot of the 1-robot session and was already in the arena). For the
24-robot session, we synchronized 21 terminals.
After each session (i.e., after 45 seconds), we did not stop the robots---the robots were continuing moving in the arena between each session (when the participants were answering the SAM questionnaire).
Data analysis
In this section, we provide the data and the R and Python scripts used to analyse and plot the data.
Data
The following archive contains a text file for each type of data (heart rate, skin conductance, arousal, valence).
Scripts
- Boxplots: R scripts that generate the boxplots
- Friedman/Nemenyi: R scripts that execute the Friedman and Nemenyi post-hoc tests
- Nemenyi CD Diagram: Python script that generates the Nemenyi critical difference diagrams. The script requires the Python library Orange.
- Correlations: R script that tests the correlations
- Habituation effect: R script that plots the graph of habituation